If you are like most people, you probably enjoy the smell of your morning coffee. But have you ever wondered what is going on with that pot? What is it doing to make your coffee smell so good and taste so rich? Well, a percolator or a drip machine boils water and sends hot water up through ground coffee beans to extract flavor molecules from the grounds.
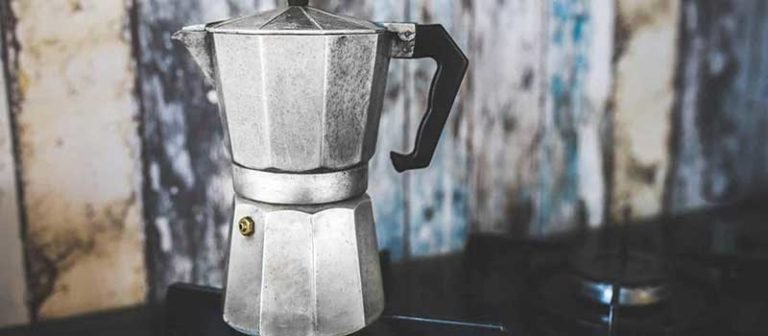
The result: delicious tasting coffee! Growing up, you probably remember your grandparents having a percolator in their kitchen. Maybe it was that old metal pot with the long handle and the small glass globe on top? The one they would put coffee grounds into and then boil water on the stove to make a fresh batch of coffee for breakfast each morning? Well, we are here to tell you that coffee lovers are now using that same technique to brew their favorite cup of joe, also iced.
This is an all-natural way to make refreshing cold brew coffee without any extra sugar or sweeteners needed. And best of all - it is easy! This article will give an overview of how to use a percolator, why they are different from other types of brewers such as french presses or espresso machines. We will also provide some tips for getting flavorful cups out of this brewer type. So grab a mug and get ready to learn something new!
The Best Coffee Machines that You Can Buy Online.
Extensively Reviewed by a Coffee-Enthusiastic.

How to Use a Percolator
Many people use percolators for coffee, but not many know how to use them. A percolator is used when you want a full-bodied cup of coffee. The water in the bottom is heated by electric coils and rises through the grounds at a controlled pace. This process ensures high-quality flavor extraction from the beans while keeping minerals intact, which leads to better-tasting coffee with less bitterness than other brewing methods.
You can use a percolator to make any type of coffee you want, but keep in mind not to put too much water or ground beans in it. This could mess up the flavor of your final product. They are great because they allow you to immediately extract flavor from whole bean coffee with no oil-based residue. However, keep in mind that this brewing method uses more acidic water, which can negatively affect the taste of your coffee if you don't use it immediately.
To make your percolator work properly, you need to pour some boiling water over the ground beans before pouring them into the percolator. This allows for better flavor extraction and keeps your coffee tasting great! If you are looking for a rich, aromatic cup of delicious coffee without dealing with expensive machines or complicated processes - this is the method for you! So, do you want to learn how to use a percolator? Read on!
How to use a Stovetop Percolator
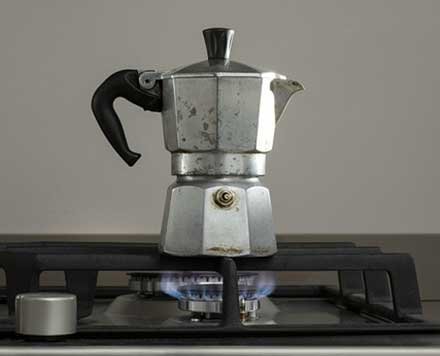
The stovetop percolator coffee maker is straightforward to use. It is pretty similar to a typical electric or automatic drip coffeemaker. Only this one needs extra effort and time for boiling the water while you wait. When using a stovetop coffee maker, boil the water first.
The water is then bubbled through the ground coffee beans to produce a rich, flavourful aromatic brew that can be enjoyed any time of the day. Its design is basically from an old heating style. People used firewood as a source of heat or fuel to boil their regular household pot for cooking. However, nowadays they use coffee maker!
Below is a step by step process of making coffee on a stovetop percolator!
What You’ll need:
- 1 quart of filtered water
- 2 cups coarse ground whole beans
- Pot
- Stovetop
Instructions:
- Fill your pot with cold water - usually about 2 cups.
- Add the desired amount of ground coffee beans.
- Turn on your stove top until it reaches boiling point.
- Place the pot on a burner and allow it to boil for approximately 10 minutes.
- You will know that it is finished when all of the liquid/ steam has risen, and your coffee grounds are floating.
- Carefully remove the pot from the burner and let sit for 10 1/2 minutes before pouring.
- Immediately pour slowly, allowing the coffee to drip into your cup.
- Enjoy your cup of Joe!
Benefits of Using a Coffee Percolator Electric

Do you ever find yourself in a rush to get out the door, and there is no time for coffee? In that case, using an electric percolator can be your best friend. This option is great because it heats up water quickly without any effort on your part, so you don't have to wait around for hours! With this particular type of coffee maker, all you need are grounds (or fresh beans), filter paper, heated distilled water - make sure it is the right temperature and voila! You will have piping hot java waiting just as fast as those other fancy machines do but with far less work required from you!
Here are some benefits of using a coffee percolator electric machine for your java needs:
- It uses less electricity than a standard coffee maker.
You may be surprised to learn that the Electric percolator uses less electricity than a standard coffee maker. It will use about 50% of what you would have used with your old machine! This is because an electric drip only requires 8-12 watts for each cup and doesn't need all those other things like heating elements or hot plates - just power from your outlet! All this translates into savings on average $2-$3 every time you brew up some java.
- Cheap to buy
It has a more affordable upfront cost, especially for those who don't have the money to buy new coffee makers. Recently there has been an increase in popularity for these machines that use electricity instead of gas. This is because they are cheaper to purchase and faster at brewing coffee thanks to their design which heats water quicker than older models.
- Easier and more convenient to use
With the advent of modern appliances, most people use coffee maker - commonly electric percolators to make coffee. These devices are more accessible and convenient than completing them on a stove top or instant pot. With the rise of convenience food, people rarely cook at home anymore. Gone is the time for slow cooking beans by boiling them over low heat; instead, we have fast-brewing machines with timers that automatically turn off when done.
- Easy to clean
It doesn't need filters or paper cups - easy cleanup. Electric percolator pots can make your life so much simpler because you don't have to go through all the trouble of scrubbing out every little ounce of ground with soap and water. Use a paper towel or sponge to wipe down the pot, and if it is still stained after letting it dry overnight, then fill up some hot water in an empty pot & pour over the top until dirty foam residue dissolves away from sides and bottom.
- It can take up to 12 cups of Java.
The modern world is an exciting place to live in. One of the things that makes it so unique and fun are advancements in technology, like our electric percolator. This device can take anywhere from 1 cup of coffee at once up to 12 cups! Whether you are having a few friends over for brunch or cooking breakfast for your family on Sunday morning, this machine will always come through with enough piping hot java as needed without taking up too much space - a perfect addition to any kitchen needs!
How to make Coffee in a Percolator

It is surprisingly simple to make a fresh pot of coffee in your very own home. All it takes is just the right amount of water, ground beans, and time for everything to settle together into one delicious brew! The first step would be finding yourself an old-fashioned percolator with no power cords or plugs.
This is essential to make a truly authentic cup of coffee. Although you can purchase percolators made specifically for home use, the ideal method is to check antique shops and yard sales for a pre-owned model. A new one can be purchased at any variety store in your local area. Learning how to make coffee in a percolator is vital to expanding your coffee knowledge. Most new coffee makers come with written instructions, but it is still recommended for you to read through the present article to better understand how percolators work and what is needed to get an optimum brew.
Coffee grounds can either be purchased from any grocery store or specialty shop or, if preferred, can also be made at home by grinding whole beans on a manual grinder or food processor until they resemble coarse sand or gravel. It is most important that the grounds are fairly consistent in size and texture; otherwise, this could contribute to some difficulties when adding them to the water within the percolator.
Follow these simple steps to get that delicious perk coffee!
What You’ll need:
- Coffee percolator
- A lid for the coffee pot
- Paper filters
- Ground, freshly roasted coffee beans.
- Water
Instructions:
- Measure out 2 1/2 tbsp of your favorite ground coffee for a ratio of 6oz cup you plan to make, in standard measuring cups. This will be enough to make about 4 6oz cups of espresso in your percolator.
- Place one paper filter on the bottom of the metal basket inside the percolator pot and then add half of the measured grounds on top of it. The basket is usually placed in its little holder on the bottom right corner of the pot chamber, but if you can't see it, you may have to lift the handle of the percolator to find it.
- Add boiling water in 1-cup increments, each time using only half a pot, until you get about halfway up the basket containing the grounds. You can cover this with a lid and wait for 5 minutes if you don't want to wait for all of the water to be absorbed into the grounds while your coffee is brewing!
- After adding each cup of boiling water, gently shake the basket or stir it a bit so that all of the coffee grounds are submerged in hot water before adding more water. This will ensure maximum saturation and extraction when your timer goes off in 15 minutes! Note: Don't allow the water to overflow since you have added too much. Simply wait a minute or two and then add more in 1-cup increments until it starts to steam and bubbles up through the grounds again.
- After adding all of your boiling water, set your timer for 15 minutes (if you didn't already do so before adding all of the water.
- Your coffee should be ready to decant into cups when it's done brewing.
- Enjoy!
Notes:
Remember that you can reuse the used paper filters by placing them into a reusable filter holder or directly on your cup if there are no metal filter holders available. Also, if you would like to reheat your coffee in a microwave once it is done brewing, here are the general guidelines: 12 minutes at full power. Start with 30 seconds at half-power and then repeat if necessary for more flavor strength in your cup of espresso!
The Best Coffee Machines that You Can Buy Online.
Extensively Reviewed by a Coffee-Enthusiastic.
Conclusion
Well, we hope you enjoyed this article on how to use a percolator! Therefore, if you are looking for a coffee maker that is simple to use and produces delicious, fresh-tasting coffee every time, look no further than the percolator! It's easy brewing process is perfect for people who are always on the go or don't feel like dealing with complicated machinery in their morning routine.
For those folks who need just enough caffeine to get them through the day but can't afford an expensive espresso machine, there is nothing better than this coffee maker! Because of the small size, it can be taken with you everywhere. So if you want your favorite drink without any fuss - grab yourself a percolator today!

As a coffee enthusiastic Dave share with you his latest and greatest coffee news and insights. He es always interested in trying out new things about the best bean of the world!
More Posts in this Category:
